

21 Outfit Drawing Ideas With Pencil Sketches to Copy
Most outfit sketches fail in the same place: the clothes sit on the figure like stickers instead of hanging off it. The fix is not more detail — it is knowing where the fabric is anchored, and letting every fold answer to that anchor.
The twenty-one sketches below are arranged roughly easy to hard, and each one names the single thing that makes it work. Copy them straight out of the post, or use them as starting points and swap the fabric. If you want a second batch afterwards, the outfit sketch ideas collection pick up where these leave off.
For ready-made line art to practice fabric shading on, the dress coloring pages collection has 34 printable gowns and everyday dresses with the folds already mapped out for you.
21 Outfit Drawing Ideas to Sketch
1. Retro Polka-Dot Fit-and-Flare Dress

The skirt is a cone seen from slightly above, not a bell — get that silhouette down before a single dot goes in. Then the dots: they are widest across the front of the skirt and squeeze together toward the edges where the fabric curves away. Draw them following the vertical folds and the whole thing reads as three-dimensional. Draw them evenly spaced and it reads as wallpaper.
2. Tailored Tuxedo With Bow Tie

Menswear is about the roll line — the soft curve where the lapel folds back, running from the button up to the collar. If that line is stiff, the jacket looks like cardboard. Notice the hatching here runs diagonally, following the fall of the cloth rather than sitting flat, and the trouser breaks once over the shoe instead of hanging dead straight.
3. Halter Wrap Dress With a Sash Knot

Everything in this dress radiates from one point: the knot at the waist. Mark it first, then fan the folds out from it — tight and compressed near the tie, opening up as they travel down. The high-low hem sells the movement because the long side trails behind the walking leg. Silk like this wants thin, unbroken contour lines with almost no interior shading.
4. Oversized Blouse With Sequin Trousers
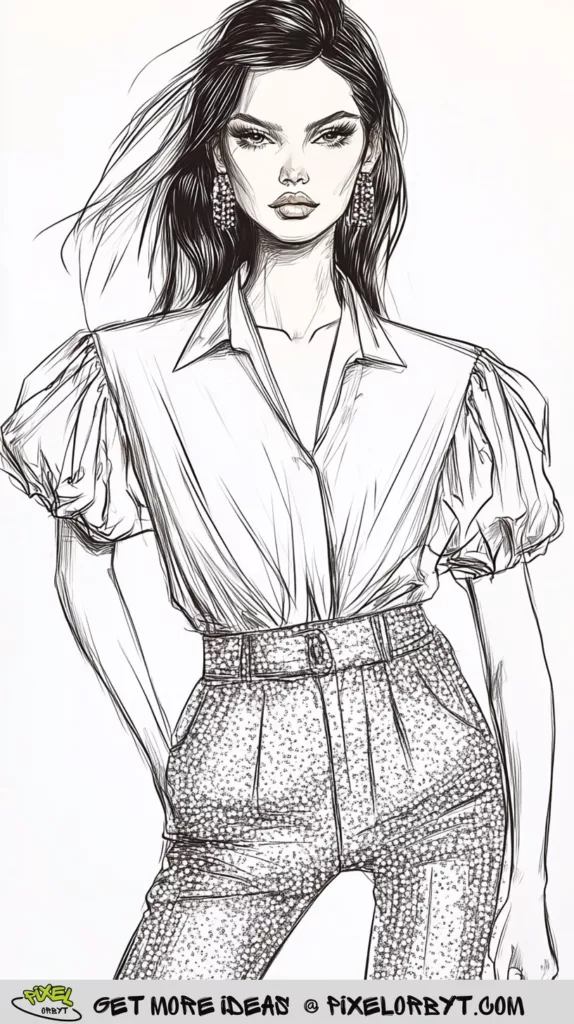
A texture exercise disguised as an outfit. The blouse collapses into big lazy folds at the elbow; the trousers are dense, stiff and built from fine stippling. Keep the two treatments genuinely different — resist shading the shirt with the marks you used on the trousers.
5. Cable-Knit Sweater Dress and Lace-Up Boots

Cables are braids, so draw the path of the braid first as a simple over-under ribbon, then shade the underside of each twist. Skip the path and you get scribble. The pleated hem flicks out at the bottom because the knit has weight and swings. Working out how knit and woven textures behave on the fabric first makes a garment like this far less intimidating.
6. Corset Bodice With Puff Sleeves on a Croquis

A headless croquis lets you think about construction instead of getting distracted by the face. The seams here curve around the ribcage rather than running straight down — that curvature is the entire illusion of a body underneath. Build up a stock of these from human figure studies and you can drop any garment onto them later.
7. Cargo Shorts as a Technical Flat

A flat has no body in it — the garment laid out symmetrically, the way a pattern maker reads it. Draw one half, then mirror it. The value is in the details you are forced to commit to: how the flap pocket sits, where the topstitching runs, how wide the belt loops are.
8. Tank Bodice With a Pleated Circle Skirt

Pleats radiate from the waistband like spokes, and each one turns from light to dark as it rotates away from you. The hem is the giveaway on a circle skirt: it should be a wave, dipping and rising as the pleats swing forward and back, never a flat arc. Fix the hem and the whole skirt starts spinning.
9. Avant-Garde Angular Silhouette

Here the garment stops describing a body and becomes architecture. Solid black wedges cantilever off the shoulders and hips, and the gaps cut into the figure carry as much weight as the figure. Block the darks in first with the side of the pencil. Nothing needs to be wearable.
10. Shirt Knotted at the Waist

A knot is a fold factory. Pull four or five creases out of it toward the shoulder and hip, then leave the rest of the shirt almost bare — the contrast is what makes it read as cotton. This one is drawn fast and loose, which is worth practising: character sketches benefit hugely from a few minutes of scribbling before you commit.
11. Beaded Gown on a Dress Form

Tulle is built from layers of light grey, not lines. Lay a soft tone across the whole skirt, then lift the highlights and darken only where layers overlap. The beaded waistband is the one place you go sharp and dense — that contrast between fuzzy skirt and crisp beading is the drawing. For more of this register, the wedding dress drawing ideas cover the same problems at length.
12. One Silhouette, Two Treatments

Same body, same pose, two garments — this is how designers actually work. The left is soft: flutter sleeves, an easy wrap front. The right is structured: notched lapels, a crisp bow belt, sharper shoulders. Drawing them as a pair teaches you more in ten minutes than two unrelated sketches would in thirty.
13. Shirtdress Spec Sheet With Detail Flats

A working page: the garment on the figure, the back view beside it, separate flats for the shorts underneath. The tie belt is the hinge — it gathers the dress at the waist and everything above and below hangs from that gather. Good practice for a portfolio spread.
14. Athleisure With Utility Shorts

Compression fabric does the opposite of drape: it clings and reveals the muscle underneath, so your shading has to follow the leg, not the cloth. The straps and zip pulls break up all that smoothness. The side view is the hard part — the ribcage tips forward while the pelvis sits back, and that offset is what stops it looking like a mannequin.
15. Off-Shoulder Corset With a Peplum

The boning channels are the structure: draw them as curved vertical lines that pinch in at the waist and flare over the ribs, and the corset immediately looks like it is holding something in. The ruffle across the bust needs an uneven, wandering edge — a neat scalloped border kills it instantly.
16. Tulle Cocktail Dress With an Oversized Bow

Almost none of this is a finished line. The skirt is a tangle of overlapping ovals, dark where they stack and open where they do not, and your eye assembles the rest. The bow is the only shape drawn with any commitment, which is why it holds the whole sketch together. Work quickly and stop before it feels finished.
17. Unbuttoned Blazer Over an Open Shirt

The widest point is the shoulder line, and every fold in the jacket hangs off it. Hands in pockets pull the jacket open and drag diagonal creases up toward the chest — that drag is the pose. Hands are usually the weak spot in outfit drawings, so if yours are giving you trouble a few dedicated hand drawing studies go a long way.
18. Oversized Sweatshirt With Cuffed Jeans

A contrast of volume: a boxy sweatshirt that ignores the waist entirely over jeans that trace the leg exactly. Keep the sweatshirt outline soft and wandering, the denim outline tight and continuous. The rolled cuff and the sneaker stop the legs tapering into nothing.
19. Minimal Jumpsuit With a Tie Waist

Line economy — maybe thirty strokes in total. A deep V, a knot, two long uninterrupted legs. With almost no shading, every contour has to be right first time, which makes it a brilliant warm-up. Draw it lightly and only commit once the proportions look correct.
20. Belted Blazer Suit in Motion

Heavy shading and a striding figure. The trailing sleeve and belt end lag behind the body because cloth always arrives late — that lag is what creates the sense of speed. Push the darks under the lapel and inside the trouser break, and leave the leading edges bright. Some walking and standing pose references help with getting the stride itself convincing.
21. Crop Tank With Heavy Cargo Pants

The pockets are three-dimensional boxes stitched to the leg, not flat rectangles — give each one a visible side plane and a cast shadow and the trousers instantly gain weight. All that bulk below the waist needs the cropped top above it for contrast, and the boots anchor the figure so it does not float.
Three Habits That Improve Every Outfit Sketch
If the drawings above still feel flat when you copy them, it is usually one of these three things rather than a lack of detail.
Find the anchor before you draw a single fold
Fabric hangs from somewhere: a shoulder seam, a waistband, a knot, a hip. Mark that point, then make every crease trace back to it. Random folds are the most common reason a garment looks pasted onto a figure.
Change your line weight on purpose
Press harder where the garment turns away from you and where two pieces overlap; lift the pencil along edges catching the light. A hem drawn at one uniform pressure has no weight. This does more than an hour of extra rendering.
Suggest patterns, do not transcribe them
Draw a dense patch of the print where the fabric is flattest, then let it fade out across the folds. Your eye fills in the rest and the pattern stays subordinate to the shape of the garment. The same trick works for lace, sequins, tweed and stripes.
Once these feel automatic, the cool outfit drawing ideas for sketchbooks are a good next challenge — the silhouettes get looser and the fabrics get harder.
Outfit Drawing FAQ
Do I need to know anatomy to draw outfits?
Enough to place the shoulders, ribcage, waist and hips — that is all. Clothing hangs off those four landmarks. You do not need muscle groups, but if you cannot find the waist, the garment will never sit right however well you render it.
Why do fashion figures have such long legs?
Fashion croquis usually run nine or ten heads tall instead of a realistic seven and a half, with almost all the extra length added below the knee. It is a display convention that makes garments read clearly. If you are drawing characters rather than clothes, stick to realistic proportions.
What pencil should I use for outfit sketches?
An HB for the construction lines and a 2B or 4B for the darks covers everything on this page. Softer grades smudge across large light areas like tulle, which is exactly what you want there and exactly what you do not want on a crisp technical flat.
Should I draw the figure first or the clothes?
The figure first, always — even a rough one you will erase. Drawing the outfit directly is how you end up with clothes that have no body inside them. Lay in the pose, then build the garment over it and rub the guide lines back at the end.
Pick three from this list rather than all twenty-one, and draw each one twice: once copying carefully, once from memory. The second pass is where you find out what you actually understood.


