

26 Things to Draw on Your Arm (With a Reference for Each)
A pen and a bare forearm is the cheapest studio you will ever own. No paper to waste, nothing to feel precious about, and a curved surface that forces you to think about how a design wraps rather than how it sits flat. The moment your line crosses the crook of the elbow, you find out whether your design has a spine.
Below are 26 designs to copy straight onto skin, each with a note on the part that will actually give you trouble. They run from a two-minute fern sprig to a full shoulder-to-wrist sleeve. Pick by the time you have and the flat area available — the inner forearm is your calmest canvas, the outer forearm curves away fastest.
What to Draw With
Use pens made for skin. A skin marker with a 0.5 mm tip gives the crisp botanical outlines most of these designs need; a brush tip gives the tapered strokes that make petals look like petals. Regular Sharpies, paint pens and gel pens are not skin-safe.
- Cosmetic skin markers — fine tip for outline, brush tip for tapering. Dry in about 20 seconds, last a day or two.
- Natural henna — thicker, rounder lines, and it stains for one to two weeks.
- Eyeliner and kohl pencils — the best tool here for soft shading. Lay the pencil almost flat, drag it, blend with a fingertip.
- Water-based body paint — for the coloured pieces further down.
Prep matters more than people expect. Wipe the area with rubbing alcohol to lift the sebum — ink beads and skips on oily skin. Shave the patch if it is hairy, because a marker tip drags hair and breaks your line mid-stroke. Do not moisturise first; lotion is the most common reason a design smears an hour later.
26 Things to Draw on Your Arm
1. A Kite-Flying Hillside Scene

This is the ambitious one, so it goes first: a boy with a kite standing above a hillside town, mountains fading into haze behind him. What makes it read is the value structure, not the detail. The figure is the darkest thing in the piece, the rooftops are mid-grey, and the mountains are barely there. Draw it in that order — lightest layer first, figure last — because you cannot lift ink back off skin. If you want to practise the depth-by-value trick on paper before committing, the same principle drives every piece in our landscape sketching references.
2. A Dandelion Going to Seed

A dandelion clock is mostly negative space, which is exactly why it is harder than it looks. The seeds are drawn as short radiating hairs with tiny dots at the tips, and the trick is to vary their length randomly — a perfectly even halo reads as a firework, not a flower.
3. Wildflowers in a Glass Jar

The whole design is a single line weight — no shading anywhere — so the glass has to be suggested by geometry alone. Two vertical sides, an ellipse for the rim, a shallower ellipse for the base, and one short curved line where the stems refract at the water level.
4. A Girl Dancing Under an Umbrella

Everything here hangs off one long C-curve running from the raised wrist, through the spine, down the supporting leg. The skirt is drawn as sweeping strokes that all originate at the waist and flare outward, and the raindrops are short tapered dashes angled the same direction as the wind in her hair. Consistent rain direction is what sells the movement.
5. A Game Character Portrait

A pointed-eared hero in a green cap, done in a trash-polka style where hard black diagonal slashes cut across the face. The slashes are not decoration — they hide the parts of the portrait you are least confident about and frame the eyes, which are the only fully rendered feature. The slashes should all run the same diagonal; crossing them turns the portrait into a scribble.
6. A Retro Tech Collage

Pocket watch, cassette player, CRT television, pager, game controller, all floating in a column of little clouds and four-point stars. Collages like this fail when the objects are all the same size. Give yourself one hero object (here the watch, sitting highest and largest), two mid-size objects, and a scatter of small ones.
7. A Blossom Branch Down the Inner Arm

Five-petal blossoms on a trailing branch, drawn with a hairline tip and shaded entirely with stippling. The inner arm is the flattest surface you have, so it is the right home for a design this fine. Draw the branch as a single travelling line first, then place blossoms at the points where it changes direction — the eye reads that as natural growth.
8. Two Poppies in Heavy Outline

The opposite discipline to the last one: fat, confident, uniform outline with zero shading. Poppies are ideal for this because the petals are crumpled, so the outline can wander and still look right. Draw the two flower heads as overlapping circles first, then break each circle into four or five petal edges with a wavy line. If you like working at this weight, more of it in our flower drawings for beginners.
9. An Abstract Colour-Blob Column

Bright circles, small grinning faces and splattered dots stacked into a vertical strip. This is the friendliest design on the list to attempt because there is no correct version of it. What still matters is the spine: keep every element within an imaginary narrow column so the arm reads as one stripe rather than a rash.
10. A Constellation Vine
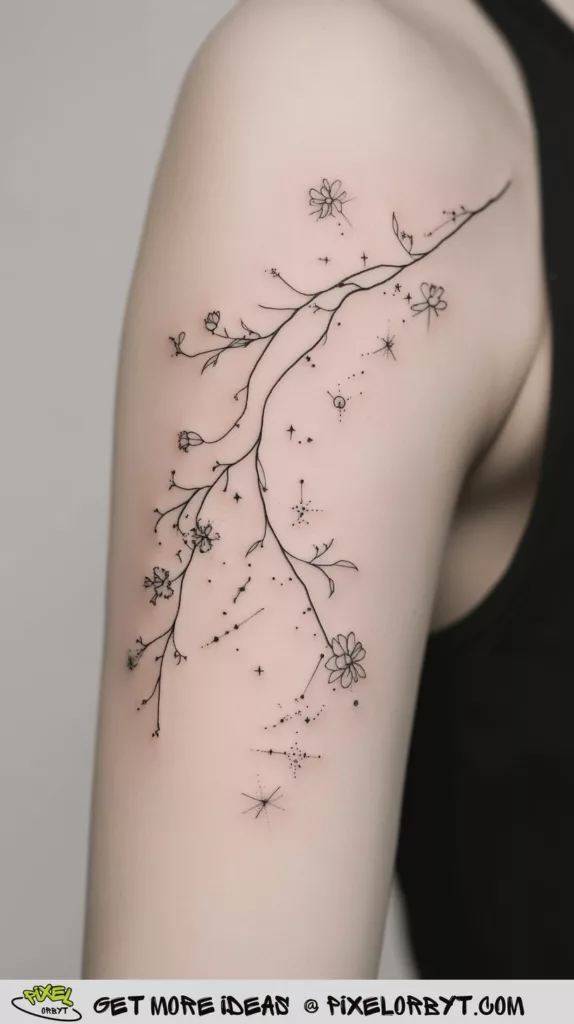
Tiny star points joined by hairline segments, with miniature blossoms sitting at some of the junctions. The design is basically a dot-to-dot, and the pleasure of it is deciding where the line branches. Draw the stars first as a loose scattered path, then connect them — connecting existing dots gives a far more natural wander than trying to draw the path first.
11. A Botanical Sprig With a Little Note
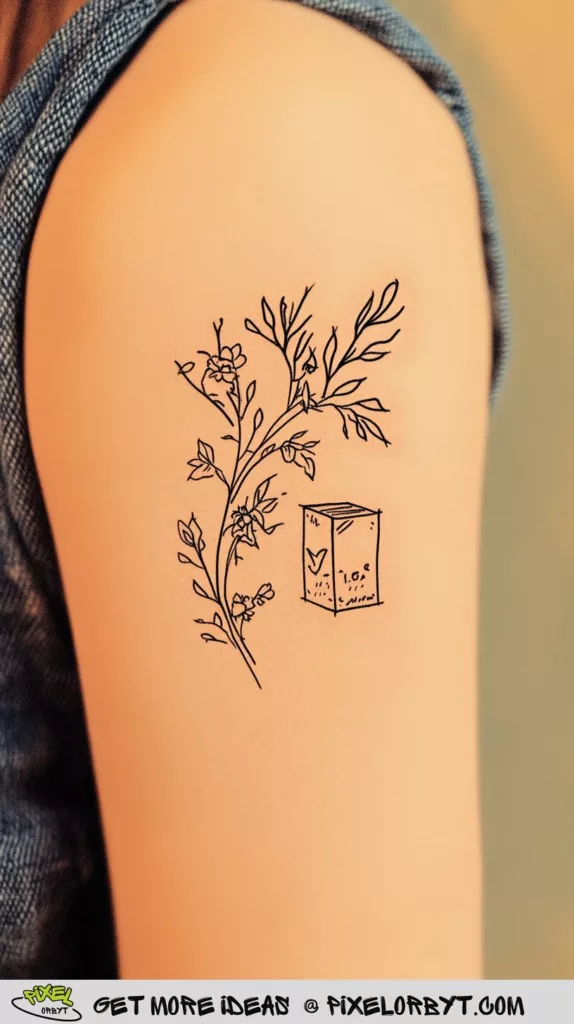
A leafy stem next to a small three-dimensional box scribbled with handwriting. Pairing a botanical with a hand-drawn object is a cheap way to make a generic sprig personal — a letter, a matchbox, a cassette, a ticket stub. Keep the object in the same line weight as the leaves or it will look pasted on.
12. A Full Floral Sleeve

Shoulder to wrist, large open blooms with foliage packing the gaps. Sleeves live or die on flow: the design must follow the spiral the arm naturally makes, so mark a light guide line that starts on the outer shoulder, crosses the inner elbow, and lands on the outer wrist. Place your three biggest flowers along that line, then fill.
13. A Single Iris on a Long Stem

One flower, drawn well, beats five drawn hastily. An iris gives you the best structure lesson available in a single bloom: three petals falling, three standing, and a ruffled edge on every one. Draw the three falls as downward teardrops first, then stand the uprights behind them. The long blade leaves cross the stem at a shallow angle — never at ninety degrees, which kills the elegance instantly.
14. A Couple Walking Hand in Hand

Two backs and a joined hand, with butterflies drifting above. Drawing people from behind removes faces from the equation, which is why this design is far more achievable than it looks. The whole emotional content sits in one place: the height difference and the slight lean of the smaller figure toward the taller one. Get that lean and the piece works even if the anatomy is loose. More of this territory in our couples and hands sketching ideas.
15. A Peony Cluster

Three overlapping peonies rendered as a proper botanical plate. Peony petals layer from the outside in, and the mistake everyone makes is drawing them as concentric rings. They are not — they overlap irregularly, and each petal has a soft notch at the tip. That density contrast at the centre is what makes the flower look open.
16. A Lion Wreathed in Flowers

The mane and the flowers have to be drawn as one shape or the design falls into two halves. Sketch the outer silhouette of the whole thing first — a rough circle — then decide which parts of that circle are fur and which are petals, alternating around the edge. Keep the outer silhouette closed and the piece reads as a medallion.
17. Fractured Faces

Four heads with closed eyes, split down the middle by a torn edge and reassembled slightly out of register. The design works because of one rule: keep the eye line of each half at a different height. Line them up and it reads as a mistake; offset them clearly and it reads as intentional fracture. If faces are your weak point, work through some portrait drawing exercises first.
18. A Single-Line Ribbon

One continuous flowing line that loops and crosses itself down the length of the forearm, with a few tiny leaves and dots thrown along it. Do not lift the pen. Speed helps here — drawn slowly the line goes shaky, drawn briskly it stays springy. Where the line crosses itself, let it cross cleanly rather than nudging around the intersection.
19. A Dreaming Child With Orbiting Planets

A sleeping face with wild hair, ringed planets and orbit lines scattered around the head. The hair and the space debris are drawn in the same nervous scribble, which is the point — the dreams and the dreamer share a texture.
20. Two Fern Fronds

The two-minute option, and the one to start with if you have never drawn on skin. Draw the central stem as a gentle curve, then add leaflets in pairs, shrinking steadily toward the tip. The only thing to get right is that the leaflets angle forward, toward the tip, not straight out.
21. A Ballerina With a Red Splash

A dancer in arabesque with a wash of red thrown behind her. The figure is solid black, the splash is loose colour, and they must not overlap much — the splash sits behind and to one side, catching only the edge of the skirt. Reverse the order and the black bleeds into the wet red.
22. A Tiny Lion in Dotwork

The same subject as number 16 at a fraction of the size, built entirely from dots and hairline flicks rather than solid line. Small dotwork rewards patience: the mane is dense dots near the face thinning outward to almost nothing, and the outer silhouette is never drawn at all — it is implied by where the dots stop.
23. A Bouquet Above the Word “Strength”

A small floral spray with a single lowercase word underneath in a thin handwritten script. Lettering on skin is unforgiving, so pencil the word in first with an eyeliner pencil, check the spacing, then ink over it. Keep it lowercase — capitals need consistent height and you will not get it freehand on a curved surface. Our meaningful sketching ideas has more word-and-image pairings worth stealing.
24. A Prowling Tiger Among Stars

A tiger mid-stride with stars scattered around it. Stripes are the whole job here, and the rule is that they wrap around the body like belts, following the curve of the ribcage and haunch rather than running down the form. Draw the tiger as a plain silhouette first, decide where the body turns, then lay the stripes across those turns.
25. An Anemone Bouquet
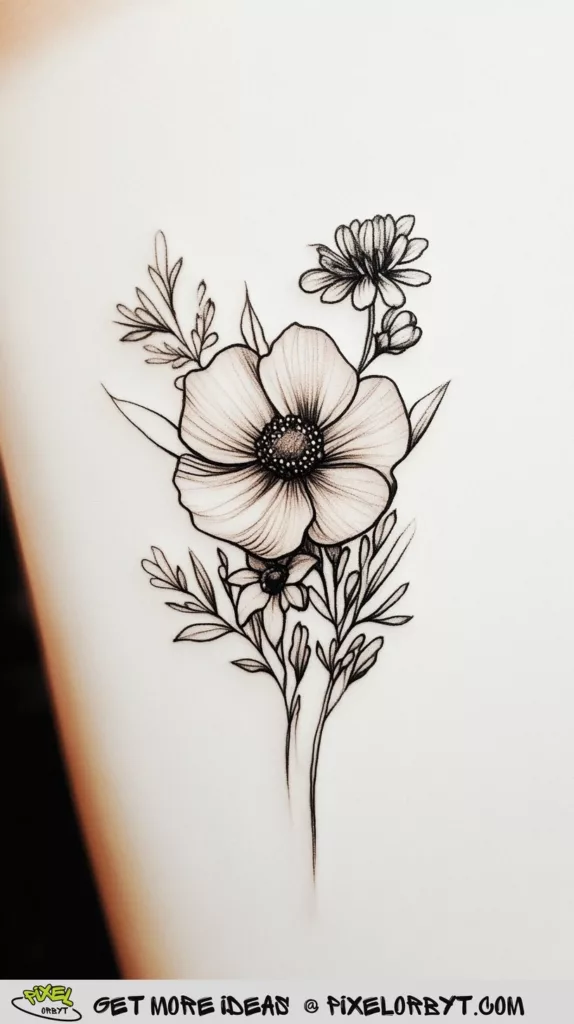
A large open anemone with a dark stamen centre, surrounded by smaller buds and thin foliage. Bouquets need a size hierarchy: one dominant bloom, two secondary flowers, and a lot of small filler. Here the anemone takes roughly a third of the total area, which is about right.
26. A Cartoon Cat-Ear Girl

Big round eyes, freckles, a bow at the throat and two cat ears poking through the hair. Chibi proportions come down to one measurement: the eyes sit at the halfway point of the head or lower, and they are enormous. Draw the head as a slightly squashed circle, put the eye line across the middle, and give the eyes a single large highlight each in the same corner. If you like the style, our cat drawing ideas collection runs from this to fully realistic.
Making It Last More Than an Afternoon
A marker design is a one- to two-day proposition at best. Stretch it by dusting the finished drawing with translucent setting powder, then misting makeup setting spray from about a foot away — close range runs the ink. Let it dry untouched for five minutes.
After that the enemies are friction and water: avoid soaping the area directly, pat rather than rub after a shower, and keep it out of long sun exposure. If you want a week or two instead of a day, henna stains the top layer of skin rather than sitting on it, darkens over the first 48 hours, and fades gradually instead of smudging.
What Not to Put on Your Skin
- Permanent markers — the solvents that make them permanent absorb through skin.
- “Black henna” — almost always contains paraphenylenediamine, which causes chemical burns and lasting scars. Natural henna is brown-orange, never jet black.
- Any pen on broken skin — cuts, shaving nicks, eczema and sunburn let pigment straight past the barrier.
- New products on a large area — patch-test a coin-sized spot on your inner wrist first.
If a design itches, stings or raises a rash, wash it off with soap and water rather than waiting to see whether it settles.
From Skin Sketch to Real Tattoo
Drawing on your arm is the best tattoo audition there is. You live with a placement for two days, see it in a mirror, and notice that it vanishes under a shirt cuff or fights the shape of your wrist bone. The most common tattoo regret is not the design but the size and position, and this is the cheapest way to test both.
If a marker version keeps earning its place, redraw it on paper at final size and take that to an artist rather than a screenshot — a drawing shows them your intent, a reference photo shows them someone else’s. Our tattoo drawing ideas and tattoo sketching walkthroughs cover how to build that paper version, including line weight and how designs read at small scale.
Frequently Asked Questions
What pen is actually safe to draw on your arm with?
Cosmetic-grade skin markers and body-art pens, which are formulated and tested for skin contact. Natural henna and eyeliner or kohl pencils are also fine. Regular permanent markers, whiteboard markers, paint pens and most gel pens are not — they contain solvents and pigments meant for paper.
How long does a pen drawing stay on skin?
A skin-marker design lasts roughly one to two days with normal washing, or up to three or four if you set it with powder and setting spray and keep it dry. Henna stains for one to two weeks and fades as the top layer of skin sheds.
How do I get it off when I want it gone?
Rubbing alcohol on a cotton pad takes marker off in seconds; micellar water or an oil-based makeup remover works more gently. Do not scrub with an abrasive — you will irritate the skin long before the ink gives up. Henna cannot be removed early, only exfoliated down over several days.
Which of these designs should a complete beginner start with?
The two fern fronds (number 20), the single-line ribbon (number 18) and the abstract colour column (number 9). All three are forgiving of a wobbly line and take under ten minutes. Save the hillside scene and the full floral sleeve until you are comfortable with how ink behaves on a curved, slightly moving surface.
Start on the inner forearm, where the surface is flat and you can see what you are doing without twisting, and keep the alcohol wipes nearby — being able to erase instantly is the reason skin is such a good place to experiment.


