

20 Two-Point Perspective Kitchen Drawing Ideas (With Breakdowns)
A kitchen is the best room to practise two-point perspective in. It is built almost entirely out of boxes — cabinets, appliances, an island, a hood — and boxes are exactly what two vanishing points were invented to control. Get the counter edges right and the rest falls into place around them.
Below are 20 kitchen sketches, ordered from bare construction lines to fully shaded interiors. Each names the specific thing it teaches, so you can pick by skill rather than by which drawing looks prettiest. For the same rules applied outdoors, the companion set of two-point perspective drawing ideas of a city is the natural next step.
20 Two-Point Perspective Kitchen Drawing Ideas
1. Bare-Bones Corner Kitchen
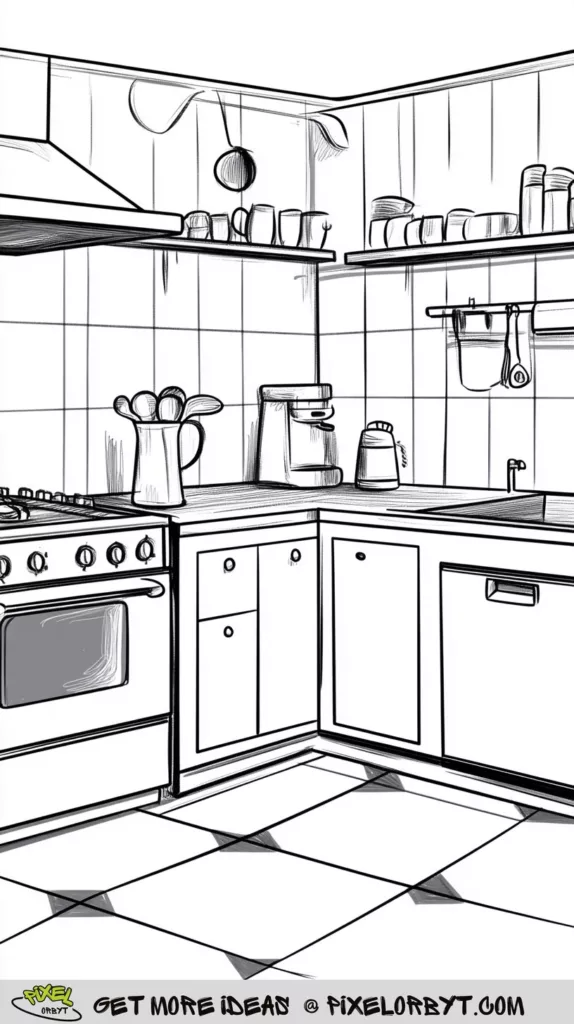
Start here if perspective still feels like guesswork. Only three planes are in play — two walls and the floor — and every cabinet edge is a straight run to one of two vanishing points. The freestanding oven is the test: its front face and its side face taper at different rates. Keep the diamond floor tiles light — they expose a misplaced vanishing point immediately. Pairs well with the warm-ups in these sketching ideas for beginners.
2. An Island Left in Construction Lines

This one is deliberately unfinished, and that is the lesson. The guidelines still run off both edges of the paper, and the stools under the counter are open boxes rather than furniture. Draw a whole kitchen to this stage, then stop. If the ceiling line and the counter line are not travelling toward the same two points, no amount of shading later will rescue it.
3. Minimalist Kitchen with a Boxed Chimney Hood

The tall rectangular hood is the whole exercise. It floats clear of the wall, so it has nothing to borrow accuracy from: its four vertical edges must stay dead vertical while its top and bottom edges head for the vanishing points. All that empty ceiling means the slightest tilt shows, and the single pendant on its long cord doubles as a plumb line.
4. Two Dome Pendants Over a Sink Island

Hanging the pendants at different heights is a cheap depth trick — the nearer lamp sits lower in the frame and reads larger, and the eye accepts the distance without being told. The sink is cut into the island top, so its rim is an ellipse squashed along the same axis as the counter. Keep the kettle and toaster small; they are your scale check.
5. Open Shelving Across the Back Wall

Two long shelves run wall to wall, and each has to converge on the same vanishing point as the counter beneath it. Stagger the bowls and mugs at different depths so they shrink as they recede instead of sitting in one flat row. The cooktop and narrow hood on the left interrupt the run, which stops the wall reading like patterned wallpaper.
6. Tiled Backsplash Behind a Gooseneck Faucet

Square tile is the most honest perspective test there is: every grout line runs to a vanishing point and every row shortens going back. Draw that grid before the tap, jars or plants. The gooseneck faucet then arcs across it, and that is what sells the depth — a curve in front of a receding flat.
7. Moody Island Worked Up in Heavy Hatching

Everything structural is already resolved here, so the work is tone. The island front is hatched almost black while the counter top stays paper-white, and that single jump does more for solidity than any outline could. The chrome stool frames catch a thin highlight down one side only. Pull hatching along the direction the surface travels, not straight down the page.
8. High-Contrast Island with Three Round Stools

The black island face, mid-grey stool seats and white floor build a three-step value ladder, which is why this sketch reads from across the room. The cooktop is sunk into the island top, so its frame is a rectangle in perspective, never a square. The same solid-box thinking runs through these 3D sketching ideas.
9. Airy Kitchen with a Warm Colour Wash

A wash of warm yellow on the back wall and a strip of wood tone on the shelves is all the colour here, and it is enough to push the white island forward. The three slim stools are drawn as wireframes, so you see the island panel through them — a good test of whether the box is solid in your head or just an outline.
10. Lived-In Island Surrounded by Clutter

Clutter is the point. Jars, wine bottles, a hanging utensil rail, a potted branch and a run of open shelving all sit at different depths, and each has to shrink by the right amount. The island front is shaded as brushed metal, a soft vertical gradient instead of hard lines. Three pendants plus recessed downlights give you overlapping shadow directions to resolve.
11. Graphite Corner with a Window Over the Sink

Copy this one when you want atmosphere rather than accuracy. The floor is graded from dark at the front edge to almost nothing near the window, and that gradient carries the depth by itself. Leave the window frame until last — it is the brightest shape and it fixes your eye level.
12. Soft Gradients on Stone and Dark Cabinets

Two textures compete: smooth veined stone on the walls, tight vertical hatching on the base cabinets. The slab hood is a plain wedge, so any wobble along its bottom edge is glaring. Let the shading fall away toward the blown-out window instead of outlining it. Blending like this is the discipline behind most realistic sketching ideas.
13. Traditional Kitchen with Hanging Lanterns

Two lantern chandeliers hang on long chains, an arched window sits behind a drape, and high-backed upholstered chairs line the island. The arch is the difficulty: a curve has to sit convincingly inside a rigid two-point framework, so block the rectangular opening first and fit the arc into it. The diagonal floor grid gives you a second set of receding lines to check against.
14. Ornate Range Under a Corbelled Mantel

The mantel above the range is layered — corbels, moulding, a projecting shelf — and every layer is a small box with its own top and bottom edges heading to the same two points. Get the mantel block correct before carving detail into it. The range below gives you a row of knobs to space evenly along a receding line, which is harder than it looks.
15. Antique Range with a Carved Overmantel

Almost frontal, with only a slight turn — which makes it a useful study in how little rotation you need before two-point rules take over. Copper pots hang from a rail, jars crowd the carved shelf, twin sinks sit left of the burners. Draw the shelf silhouette first and drop the objects onto it; the other way round and the shelf line drifts. Density like this rewards a fine nib, as in these ballpoint pen sketching ideas.
16. Galley Kitchen Seen from a High Vantage Point

The eye level sits well above the counters, so you see the tops of everything and the floor opens up wide. Raising the horizon line changes every angle in the drawing, and sketching a view like this is the fastest way to feel that rather than read about it. Burner rings and stacked plates flatten into ellipses as they travel back.
17. Full Layout Plan with a Dining Zone

This is how designers sketch: a near-isometric overview of the whole room — cabinets on three walls, an island, a dining table and chairs — with dimension marks and construction lines left visible. Draw one before attempting a finished interior — deciding where furniture goes is far cheaper while the lines are cheap, and the habit carries over to any architectural building sketching.
18. A Sketchbook Open on the Kitchen Counter

Drawing the room you are standing in beats copying a photo, because you can move your head and check what you have assumed. Here the pad sits on butcher block among a rolling pin, shakers and a utensil crock. Hold a pencil at arm’s length, match its angle to the counter edge, then transfer that angle to the page.
19. Large-Sheet Study of an L-Shaped Kitchen

A bigger sheet lets you put both vanishing points on the paper instead of guessing at marks somewhere off the edge of the desk. This L-shaped layout puts the range and microwave on one wall and the sink on the other, so the two runs disagree in direction — precisely the problem two-point perspective exists to solve. Tile the floor last.
20. Industrial Pendants in a Pocket Sketchbook

Small format, loose grip, twenty minutes. Two dome pendants, a cooktop set into the island, a cutting board and a coffee maker — enough to read as a kitchen and nothing more. Working this small trains you to commit to your vanishing points fast, because there is no room to redraw. Single appliances make good filler studies too, along the lines of these object sketching ideas.
How Two-Point Perspective Works in a Room
Two-point perspective uses two vanishing points on a single horizon line. Unlike one-point, where a wall faces you square on, you are standing at a corner: two walls angle away and each sends its lines to a different point. That is why it suits kitchens, where a run of cabinets on one wall meets a run on another.
- Set the horizon line first. It is your eye level, not the middle of the page. Drop it low and you are seated at the island; raise it and you look down on the counters, as in sketch 16.
- Place the vanishing points wide. Cramp them together and the room warps like a fisheye lens. Push them past the paper edges and tape scrap either side to hold them.
- Block the room as one box. Floor, two walls, ceiling — everything after is a smaller box inside it.
- Keep verticals vertical. Cabinet sides, fridge edges, table legs. Only horizontal edges converge.
- Add detail last. Handles, tiles and taps sit on planes you have already proven correct.
Fixing the Three Mistakes That Ruin Kitchen Perspective
- Points too close together. Counters look like they are sliding off a cliff. Widen the gap.
- Two eye levels in one drawing. Usually from adding the island after the walls. Rule the horizon across the whole sheet and keep it visible.
- Guesswork on the floor. Tiles are unforgiving. Find the first row’s depth from the diagonal of a square, then repeat it back instead of eyeballing.
Kitchen Perspective Drawing FAQ
When should I use one-point instead of two-point perspective?
Use one-point when you look straight down a galley and the back wall faces you flat — only the side runs converge. Use two-point the moment you stand at a corner and see two walls angling away, which is where people actually stand in a kitchen.
Where do the vanishing points go for an interior?
Off the page, usually. Interiors are wide, so points that fit comfortably on your sheet will distort the room. Tape scrap paper to each side, mark the points there, and use a long ruler to reach back in — drawing each line from the point inward, not from the object outward.
How do I draw a kitchen island correctly?
Treat it as a plain box drawn to the same two points as the walls before it is an island. Set the top rectangle, drop verticals from its corners, close the bottom. Only once the box is right add the sink cut-out, the panelling and the stools.
Why do my cabinets look stretched?
Almost always because the vanishing points sit too close together, which exaggerates how fast edges converge. The other cause is placing objects at the far outside edge of your cone of vision, where distortion is real even with correct construction. Widen your points or move the cabinet toward the centre.
Pick one sketch, resolve the box, let the detail follow. A kitchen built correctly at the block stage holds up no matter how much shading goes on top. For more subjects that reward the same box-first approach, try these simple house drawing ideas.


